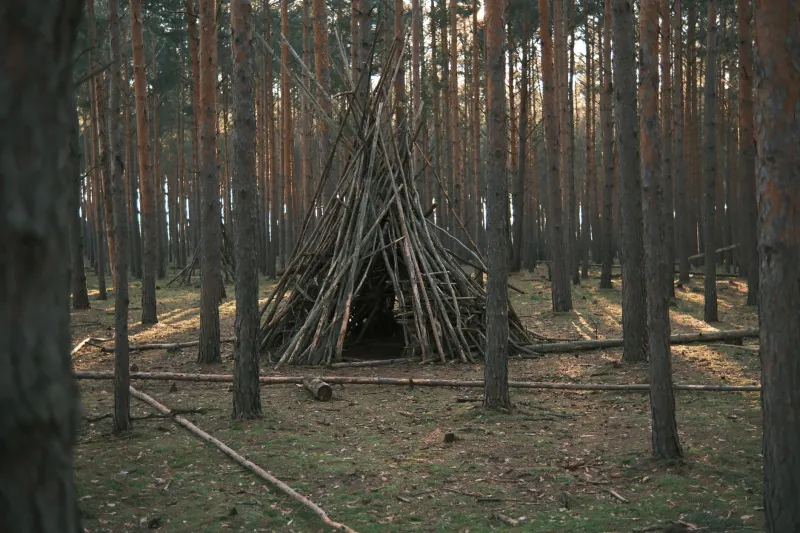
Rope, Branches, and Grit: How to Lash Together a Shelter That Actually Holds
There's a certain kind of confidence that comes from knowing you could build a roof over your head with nothing but what the forest gives you. Not the Instagram kind of confidence — the real, quiet kind that comes from actually doing it, failing, fixing it, and doing it again until it holds.
Lashing-based shelter construction is one of those skills that looks deceptively simple until you're out there with wet cordage, uneven poles, and a storm rolling in from the west. The good news? It's absolutely learnable. The better news? Once you've got it down, you've got it forever.
Let's get into the how.
Why No Nails Isn't a Limitation — It's a Feature
Most people assume that metal fasteners are what make a structure strong. That's not entirely wrong, but it misses something important: traditional builders across North America, from Indigenous communities to frontier settlers, raised structures that lasted decades without a single nail. What they understood — and what most modern folks have forgotten — is that tension and friction are your real building partners.
A well-executed lashing joint doesn't just hold pieces together. It distributes load across the full contact surface, flexes slightly under stress instead of cracking, and can be tightened or adjusted in the field. Try doing that with a bent nail.
Beyond the mechanics, there's a practical survival argument here: nails require a hardware store. Cordage can be made from plant fibers, paracord from your kit, or even strips of bark in a pinch. When supply chains get weird — and if you're a prepper, you know they can — the ability to build without manufactured fasteners is worth its weight in gold.
Choosing Your Materials: Not All Branches Are Created Equal
Before you start lashing anything together, you need to think about your poles. Green wood — freshly cut branches — is actually your friend here. It's heavier than dried wood, yes, but it's also flexible and much less likely to snap under lateral stress. Hardwoods like oak and hickory are ideal for load-bearing ridgepoles. Softer, straighter woods like poplar or young pine work well for the secondary framing.
For cordage, natural fiber rope, bank line, or 550 paracord are all solid choices. If you're practicing primitive skills, learning to make cordage from dogbane or stinging nettle is a worthwhile rabbit hole — but for a genuine survival situation, pre-packed bank line is hard to beat for strength-to-weight ratio.
Avoid dead, standing timber for anything structural. It looks solid until it isn't.
The A-Frame: Your Starting Point
The A-frame shelter is the gateway build for a reason. It's structurally sound, sheds water naturally, and can be completed in a couple of hours once you know what you're doing.
Here's the basic process:
- Find or cut a ridgepole — this is your spine. It needs to be long enough to extend past your body length on both ends, and thick enough that it doesn't visibly sag when supported at both ends.
- Set your uprights — two forked branches or lashed A-frames at each end support the ridgepole. The fork method is faster; lashed tripod-style uprights are more stable in wind.
- Lash the ridgepole into the forks using a clove hitch at each end, followed by a few frapping turns to lock it tight.
- Add your rafters — lean branches from the ridgepole to the ground at roughly 45 degrees on both sides. Lash each rafter to the ridgepole with a simple diagonal lashing.
- Layer your debris or bark shingles from the bottom up, like roof shingles. Overlap each layer so water runs off rather than in.
The most common failure point here is the ridgepole joint. If it's not lashed tight enough, the whole structure shifts when you put weight on it — or when wind hits it sideways. Take your time on that connection.
The Lean-To: Fast, Functional, and Field-Tested
If you need shelter fast and you've got a natural windbreak — a rock face, a dense stand of trees, an embankment — a lean-to is your move. It's essentially half an A-frame, and it goes up in half the time.
Lash a horizontal crossbar between two trees or upright posts at roughly chest height. Then lean your rafter poles from that bar down to the ground at a low angle — somewhere between 30 and 45 degrees works well. Lash each rafter to the crossbar with a diagonal lashing. Add your roofing material, pile debris on the windward side, and you've got a serviceable shelter in under an hour.
The lean-to's weakness is wind coming from the open side. Solve that by adding a partial side wall — just a few lashed poles filled in with woven branches and debris — and your heat retention improves dramatically.
Square Lashing vs. Diagonal Lashing: Know the Difference
These two lashing types do different jobs, and mixing them up is one of the most common beginner mistakes.
Square lashing joins two poles at right angles. Start with a clove hitch, wrap around both poles in a square pattern (over, around, repeat), add frapping turns between the poles to tighten everything up, and finish with another clove hitch. Use this for your upright-to-crossbar connections.
Diagonal lashing is for bracing — joining two poles that cross at an angle and are under tension. It's what keeps your structure from racking sideways in wind. Start with a timber hitch, wrap diagonally in both directions, frap between the poles, and tie off. Any time you're joining rafters to a ridgepole, you want diagonal lashing.
Skip the bracing and your shelter will feel solid until the first gust hits it. Then it'll fold like a lawn chair.
Test It Before You Need It
Here's the honest truth about shelter building: your first one is going to have problems. That's fine — as long as you find those problems during a backyard practice session rather than a genuine survival situation.
Build one. Sleep in it. See where the drafts come in, where water pools on the roof, where the lashings loosen overnight. Fix those things. Build another one. This is the kind of skill that compounds with practice, and the gap between a shelter that's technically standing and one that's actually comfortable is where real craftsmanship lives.
The wilderness doesn't grade on a curve. But it does reward preparation.