Wet Wood, Hand Tools, and No Hardware Store: The Survival Builder's Guide to Green Wood Construction
There's a certain kind of confidence that comes from knowing you could walk into the woods with a hand saw, a mallet, and a good knife — and walk out having built something that would keep a family dry for a season. That's not a fantasy. That's green wood carpentry, and for most of human history, it was just called building.
Before the big-box hardware stores, before kiln-dried dimensional lumber, and long before construction adhesives and metal fasteners, American settlers, frontier homesteaders, and Indigenous craftsmen were raising shelters and crafting furniture from freshly cut timber. No nails required. No power tools. Just an understanding of how wood behaves when it's still alive with moisture — and how to use that behavior to your advantage.
If you're serious about long-term preparedness, this is one of the skills worth putting real time into.
Why Green Wood Is Actually Easier to Work With
Here's something that surprises most people: green wood — timber cut fresh from a living tree — is significantly easier to shape than dried, seasoned lumber. The moisture content keeps the fibers flexible and soft. You can carve it, split it along the grain, and cut joints into it with far less effort than you'd spend wrestling with a dry 2x4.
The catch is that green wood moves as it dries. It shrinks, it checks (develops small cracks), and it can warp if you don't account for that movement in your design. Traditional green wood builders knew this, and they designed around it. That's the whole genius behind techniques like the mortise and tenon joint — the wood's own drying process actually tightens the connection over time.
Species matter too. In most parts of the US, you'll have access to at least a few good candidates. White oak is a classic choice — strong, rot-resistant, and it splits cleanly. Hickory is extraordinarily tough and great for tool handles and structural members. Eastern red cedar resists decay naturally and smells incredible. Even softer species like tulip poplar work well for shelter framing when you're working fast and need something manageable.
The Mortise and Tenon Joint: Your Most Important Skill
If you learn one joinery technique for survival building, make it the mortise and tenon. It's been used for thousands of years across virtually every woodworking culture on earth, and for good reason — it's strong, it requires no metal hardware, and it can be cut with basic tools.
The concept is simple: a tenon (a projecting tongue of wood) fits into a mortise (a corresponding rectangular hole cut into a receiving piece). When the joint is assembled and the wood dries, the tenon shrinks slightly while the mortise holds its shape, locking everything together.
To cut a basic mortise and tenon in the field:
- Mark your tenon first. Using a knife or pencil, mark the shoulder lines around the beam where the tenon will begin. A tenon is typically one-third the thickness of the stock.
- Saw the shoulders. Use a hand saw to cut down to your marked lines on all four faces.
- Split or pare away the waste. A chisel and mallet work here. Split off the bulk, then pare to your line.
- Lay out the mortise. Mark the hole to match your tenon dimensions. A brace and bit (or a sturdy hand drill) lets you remove most of the waste by drilling a series of overlapping holes.
- Clean the walls. Use a chisel to square up the mortise walls and flatten the bottom.
- Test the fit. The tenon should slide in with hand pressure — snug but not forced. Green wood will tighten as it dries.
For a survival shelter, you're not going for furniture-grade precision. You're going for strong and functional. A little slop in the joint is fine — a wooden peg driven through a hole bored through the assembled joint (called a treenail or "trunnel") will lock everything in place.
Wooden Pegs: The Original Fastener
Forget nails. In a true grid-down, supply-chain-severed scenario, wooden pegs are your fastener of choice — and they're shockingly effective.
A well-made wooden peg driven through a drawbored mortise and tenon joint creates a connection that can last generations. "Drawboring" means you offset the hole in the tenon slightly from the hole in the mortise, so when you drive the peg through, it draws the joint tight mechanically. Barn builders used this technique for centuries across rural America, and those old barns are still standing.
For pegs, you want a dense, straight-grained wood — hickory, white oak, and locust are all excellent. Split the peg from a billet rather than sawing it; split wood follows the grain and is far stronger. Whittle it to a slightly tapered, octagonal shape. Round pegs in square holes actually seat better than perfectly round pegs because the corners bite into the wood.
Steam Bending: When Straight Wood Isn't Enough
Not every structural need can be met with straight timber. Roof arches, curved furniture frames, and ergonomic tool handles all benefit from bent wood — and steam bending makes it possible without any specialized modern equipment.
The principle is simple: steam softens the lignin that holds wood fibers rigid. While hot, the wood can be bent around a form and held there until it cools and dries in the new shape.
A basic field steam box setup:
- Find or dig a metal container long enough for your stock (an old metal pipe or even a tightly constructed wooden box lined with clay will work in a pinch)
- Build a fire and heat water in a separate vessel, directing steam into the box through a hole
- Load your wood and steam it — roughly one hour per inch of thickness is a common rule of thumb
- Bend the softened wood around a form made from stakes driven into the ground and hold it with lashing until cool
Good species for steam bending include white oak, ash, and hickory. Avoid anything with irregular grain — it'll crack under bending stress.
Putting It Together: A Basic Survival Shelter Frame
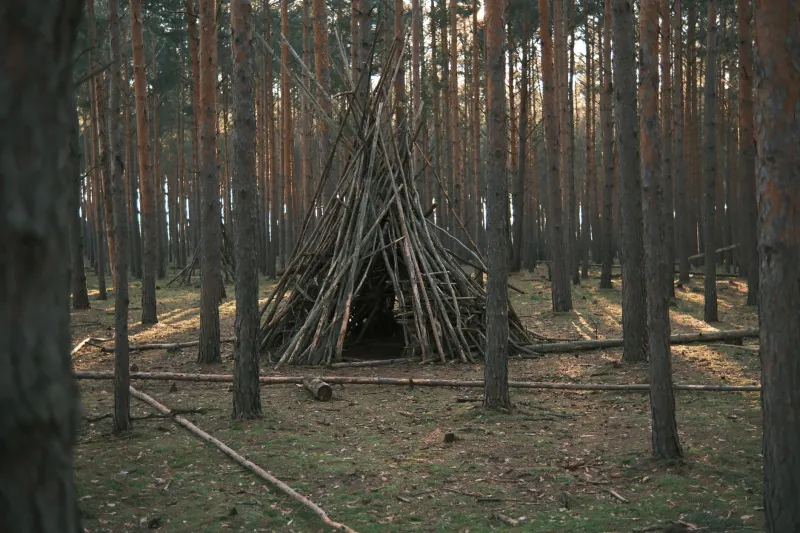
With mortise and tenon joints, wooden pegs, and some basic lashing, you can raise a simple A-frame or lean-to shelter frame from green timber in a single day. The general sequence:
- Harvest your uprights and ridge pole. Straight, reasonably uniform logs work best. Debark them to reduce insect habitat and help them dry evenly.
- Cut the joints. Notched lap joints work faster than full mortise and tenons for a quick shelter — cross-lap two pieces and lash or peg the intersection.
- Raise the frame. Have a partner help. Prop uprights, set the ridge, and brace with diagonal members.
- Add rafters. Lash or notch them into the ridge and top plates at regular intervals.
- Cover it. Bark slabs, woven branches, turf, or canvas — whatever you have.
The Bigger Picture
Green wood carpentry isn't just a survival skill — it's a way of thinking about materials and self-reliance that pushes back against the idea that you need a trip to the hardware store before you can build anything. The forest is a lumberyard. Your hands and a few good tools are the machinery.
Practice these techniques now, before you need them. Start small — a garden bench, a sawhorse, a simple storage rack. Get comfortable with how green wood moves and how joints come together. By the time you're working under pressure, you want muscle memory, not a learning curve.
Real preparedness isn't just about stockpiling gear. It's about stacking skills. And this one has been keeping people sheltered for ten thousand years.