Raw Gear, Earned Trust: The Old-Timer's Guide to Conditioning Primitive Tools Before You Need Them
There's a quiet confidence that comes from reaching for a tool you've already put through its paces. The handle fits your grip like it was carved for your hand. The blade bites clean. The wood doesn't shift or creak under pressure. That kind of reliability doesn't come off the shelf—it gets built in, deliberately, over time.
Most folks today don't think about this. They buy a hatchet, a drawknife, or a hand-forged blade, and they expect it to perform like it's been living in a barn for thirty years. It won't. Not yet. But with the right conditioning process—what the old-timers would have just called "breaking in" or "seasoning"—you can compress years of earned performance into a few focused sessions.
This isn't just about aesthetics or tradition, though both matter. It's about function, longevity, and trust. In a real survival scenario, gear that hasn't been properly conditioned can fail you in subtle ways—swollen handles that loosen in wet conditions, blades that don't hold an edge because the steel was never stress-tested, wooden components that crack because they were never fed. Let's fix that.
Why New Tools Are Essentially Unfinished Products
Here's something most people don't realize: a tool that just came out of a workshop or off a production line is technically incomplete. The wood in the handle still has moisture content that will shift with temperature and humidity changes. The metal hasn't experienced the micro-stresses of real use that actually help align the grain structure of the steel. The finish, if there is one, is factory-applied and hasn't bonded with the material the way a hand-rubbed treatment will.
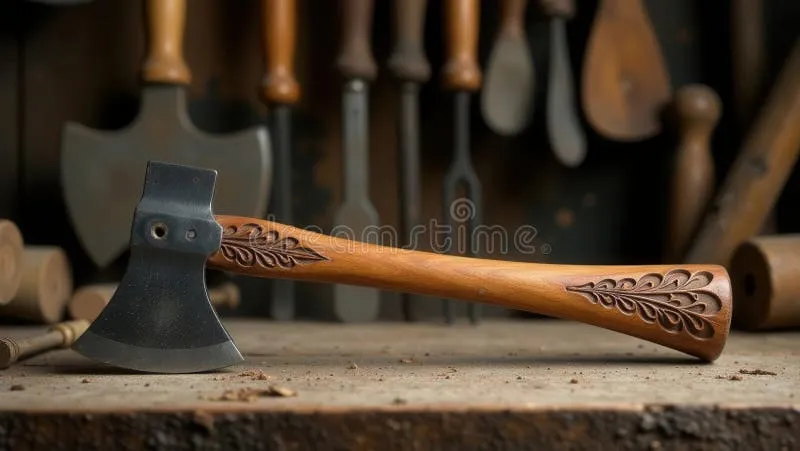
Historical craftsmen understood this intuitively. A new axe handle got soaked in linseed oil before it ever saw a log. A new blade got worked on soft material first, then progressively harder stock. A leather sheath got conditioned with tallow before the knife ever rode in it. None of this was ceremony—it was engineering with the materials available.
The goal was always the same: close the gap between "new" and "ready."
Handle Conditioning: Feed the Wood Before It Feeds You
Wooden handles are the most overlooked component in any primitive toolkit. People baby the blade and ignore the handle, and that's exactly backwards. A dull blade is annoying. A handle that cracks, loosens, or blisters your palm under sustained use is dangerous.
Start with raw linseed oil—boiled linseed oil works faster, but raw linseed oil penetrates deeper and cures harder over time. Warm the oil slightly (not hot, just warm) and apply it liberally to the bare wood. Let it soak in for 20 to 30 minutes, then wipe off the excess. Repeat this process every day for a week. You'll notice the wood darkening and the grain tightening up. That's exactly what you want.
After the initial soak cycle, let the handle cure for several days in a dry environment. Then do a light sanding with fine-grit paper to knock down any raised grain, and apply one more coat. What you end up with is a handle that repels moisture, resists cracking, and develops a natural grip texture that only improves with use.
For handles that are already fitted to a tool head, soak the entire head-end joint in a bucket of linseed oil for a few hours. This swells the wood fibers around the eye and creates a tighter fit than most factory assemblies ever achieve.
Blade Seasoning: It's Not Just About Sharpening
Conditioning a blade goes well beyond running it across a whetstone. The edge matters, obviously—but so does the surface of the steel itself and the way the tool responds to repeated use.
For carbon steel blades (which are the right choice for any serious primitive toolkit), the first step is building a controlled patina. A patina is a thin layer of stable oxidation that actually protects the steel from the kind of rust that eats into the metal. You can accelerate this naturally by wiping the blade with a cut potato or apple, letting the mild acid react with the steel for a few minutes, then neutralizing it with a dry cloth. Repeat several times. The blade will darken unevenly at first, then settle into a uniform gray-brown surface that's significantly more corrosion-resistant than bare bright steel.
Once the patina is established, apply a thin coat of food-grade mineral oil or rendered animal fat. This isn't just about rust prevention—it's about teaching yourself the maintenance habit. Every time you pick up that blade, you should be reading its surface. Is it dry? Is there any spotting? The act of conditioning trains your eye.
For the edge itself, don't start on your finest stone. Work the blade through progressively finer grits, but begin with actual use on appropriate material. Split some kindling. Whittle a stake. Score some cordage. Light work on real material reveals edge inconsistencies that a bench stone session alone won't catch.
Leather and Fiber Components: Don't Neglect the Support Gear
Sheaths, straps, wrappings, and pouches are just as critical as the tools themselves, and they need conditioning too. Dry, unconditioned leather cracks under cold and stiffens in heat. Fiber wrappings that haven't been set properly will loosen under tension.
For leather, neatsfoot oil has been the standard for generations—and for good reason. It penetrates deeply without breaking down the fiber structure the way petroleum-based products can over time. Apply it with your fingers, work it into every crease and fold, and let it absorb overnight. A well-oiled leather sheath will outlast the tool it carries if you keep up the maintenance.
For wrapped handles or lashed components, work the wrapping loose slightly, apply a thin coat of beeswax to the cordage, then re-tension and tie off. The wax fills the gaps between fibers, adds water resistance, and locks the wrap in a way that friction alone never quite achieves.
The Break-In Period: Putting It All Together
Once you've done the initial conditioning work, the real seasoning happens through use—but structured use. Don't take a freshly conditioned axe straight into a full cord of hardwood. Start with lighter tasks. Let the handle flex and settle. Let the blade find its geometry against real material. Give the oil time to cure under real conditions.
Spend a few sessions just doing camp tasks: splitting kindling, shaping tent stakes, clearing brush. Pay attention to how the tool feels. Is the handle starting to conform to your grip? Is the blade holding its edge through moderate use? These are signs the tool is coming into itself.
After each of those early sessions, re-oil any wood that looks dry, touch up the edge, and inspect the joints. This isn't babying the tool—it's building the inspection habit that will serve you for years.
Gear That Gets Better With Age
Here's the thing about properly conditioned primitive tools: they don't just hold up over time—they improve. The handle darkens and tightens. The blade develops a working patina that actually performs better than bare steel. The leather softens and molds. Every hour of honest work adds to the tool's character and capability.
That's not a romantic idea. That's materials science playing out the way the old-timers understood it, even without the vocabulary to explain it. They just knew that a tool needed to be earned before it could be trusted.
Your gear should be the same. Do the work upfront, and what you end up with isn't just a tool—it's a companion that's been field-tested, fed, and proven. That's the kind of kit you actually want in your hands when the situation gets real.